Getting started with Flnet.
Download the most recent version: http://www.w1hkj.com/alpha/flnet It is available for Mac, Windows and Raspberry pi. currently it is 7.5.0.10.
To simplify the set up you can download two files on WDN website. WDN.csv is the database for Flnet. It is preloaded with 73 Op records. The other file is FLNET.prefs. The last file to include is my macros for WDN or build your own from WDN/NCS tab.
Open flnet.files directory and overwrite the default file with FLNET.prefs. Add the WDN.csv to the flnet directory as well. I have tested this and it sets up the Config file automatically.
Start Flnet:
Open your Config file it should now look like this:
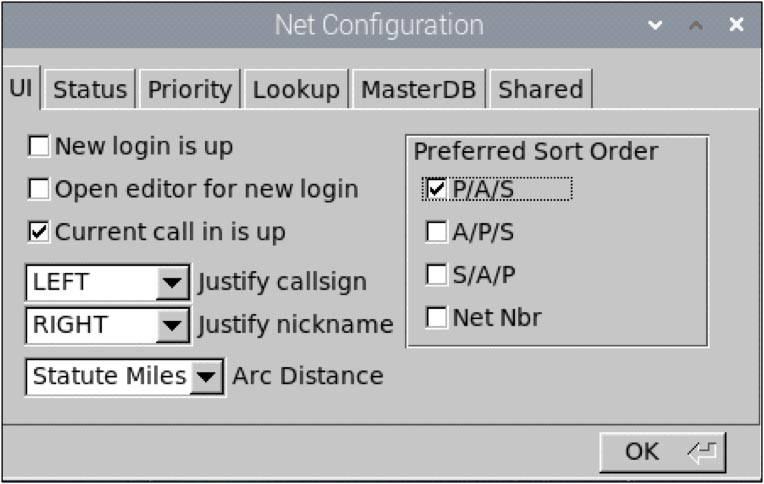

Priority tab is not used.
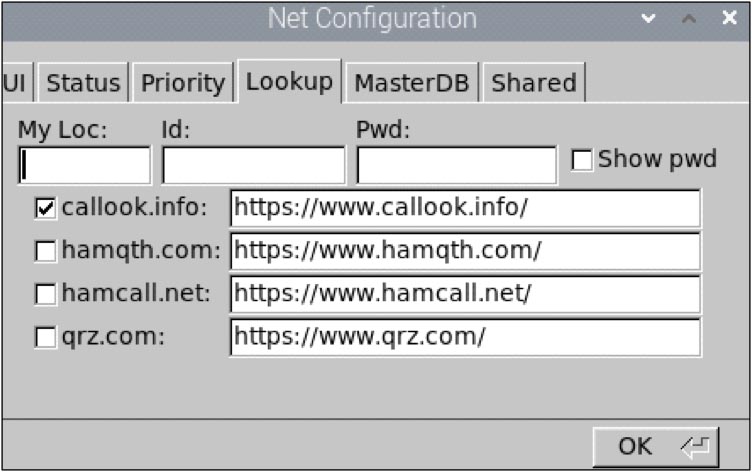
callook.info is free. If you qrz.com click it and it will ask for your password.

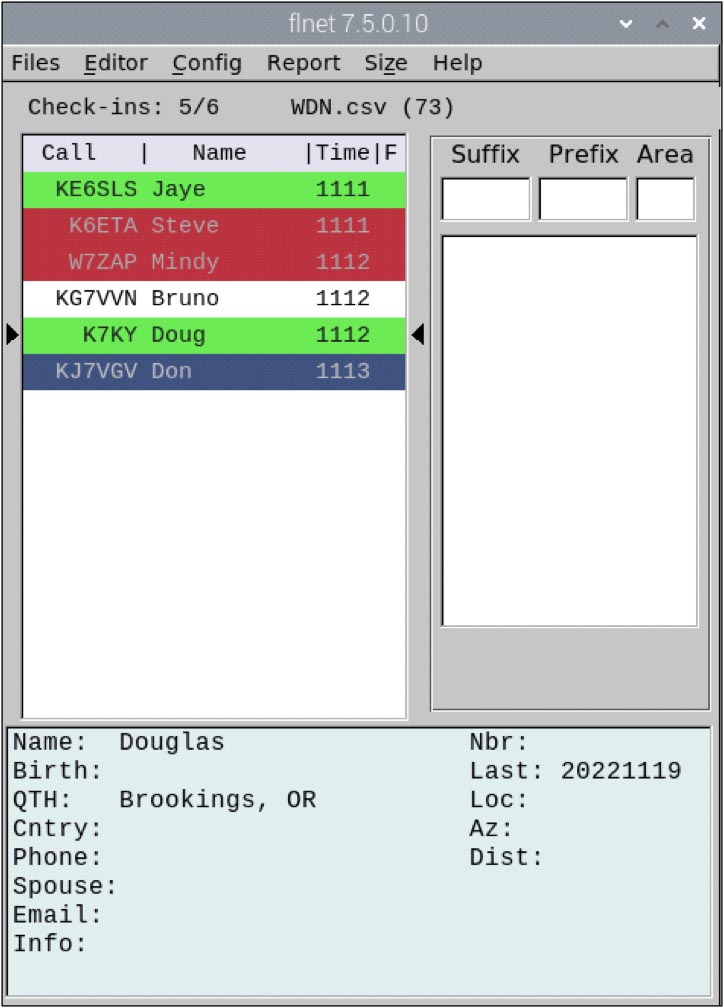
Close the Config file. Now click on Files then Open. The csv files will open. Select WDN.csv and click Okay. On Windows you will not get an error but you will get an error warning with Mac just ignore. On the main screen of Flnet you will see at the top WDN.csv (73). Flnet is ready for use.
Using Flnet during a net:
Open Flrig, Fldigi, Flamp, Flmsg, and Flnet. Make sure Flmsg defaults to “Blank form”. W1HJK Dave has linked Fldigi with Flnet databases. When an Op checks in select call sign in your Rx window in Fldigi, just highlight it or click on the call sign. It will show up in Fldigi call sign box at top. To transfer the call sign from Fldigi click on Flnet to make it active then hit F11 on your keyboard. On a Mac hit shift F12, or shift F11 will also work on the Mac. Call sign will automatically be transferred to the check in box between the two arrows of Flnet. If the call sign is in the database a faint blue screen below will show all the Ops information.
Exception: If it’s a new call sign that is not in Fldigi, once you look up their information and it populates in all fields in Fldigi. Then when you transfer the call sign to Flnet with F11, it will post all the updated informtion from Fldigi into the database of Flnet and it will save the new call sign data automatically.
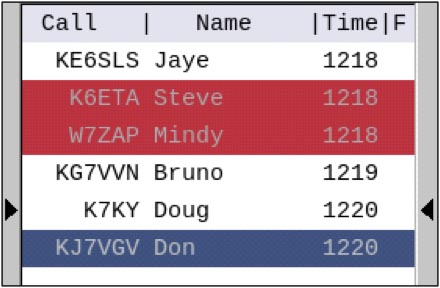
The next thing to do with the call sign that is between the arrows on the main screen is select F1 for QRU which remains white, F2 for QNX which turns red, F3 for QST which turns green, and F4 for NCS which turns blue.
At any time you hit a wrong key just use the ESC key to back out. Continue to log in call signs. When early check-in ends at 19:30P it’s time to start your Prologue macro. After it calls for last check-ins. If someone checks-in add to Flnet. Then put your call sign in Fldigi call box go to Flnet hit F11 then F4 for NCS.
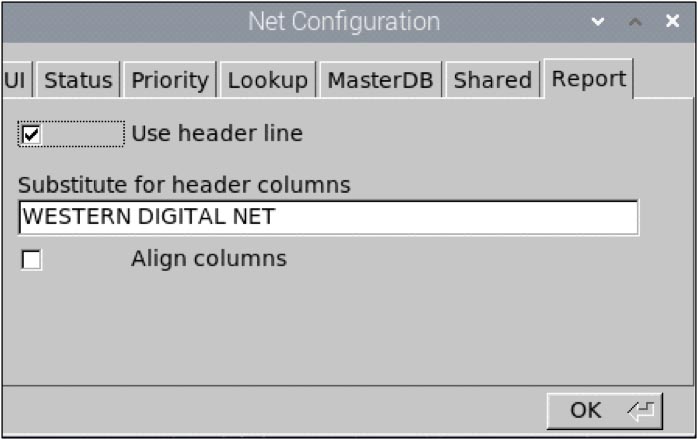
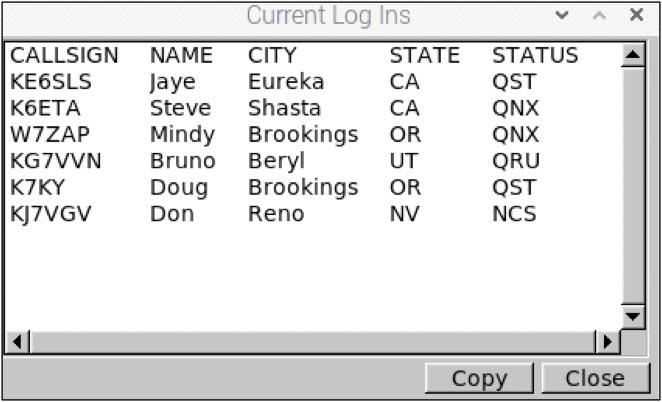
Now seltect the Report tab at the top of Flnet and click on Log-Ins. Another window box will open up with your roster, IMPORTANT ignor the format seen “Current Log Ins”. This is the old format but will auto update with Flmsg.
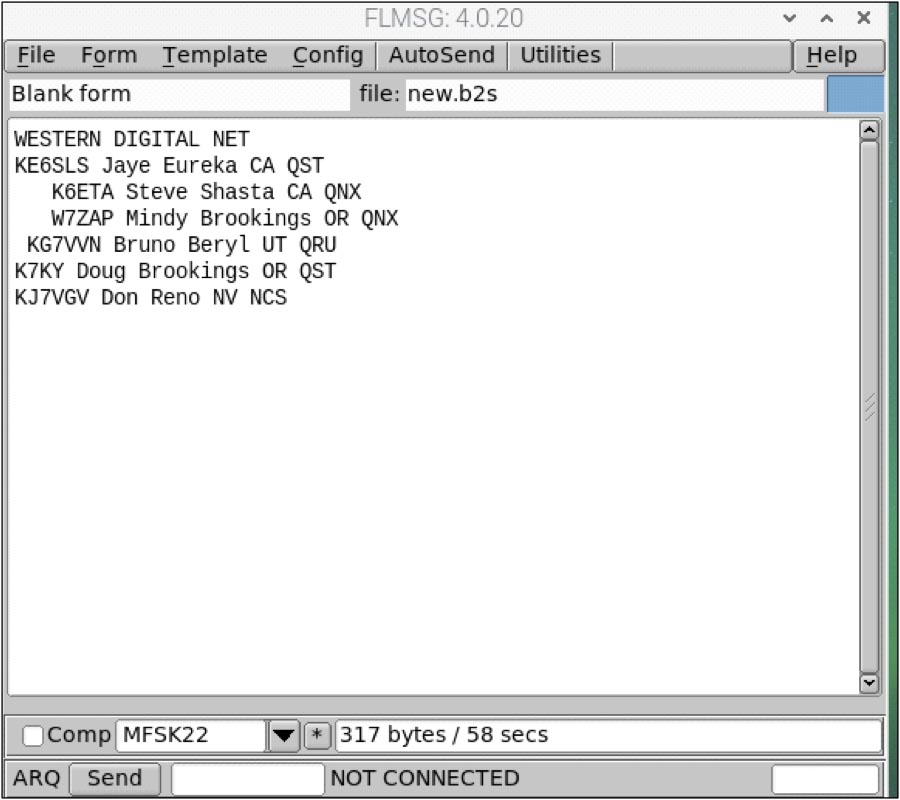
I have choosen to use no spaces for QST, 1 space for QRU and 3 spaces for QNX. Under Flnet Config you can change those values if you want.
Now here comes the fun part! It’s time to do the QST. Make sure your on Flnet. Click to make it active, use the up arrow on your keyboard and move up to the first QST that is green, hit return it instantly puts it back into Fldigi in the Call box.
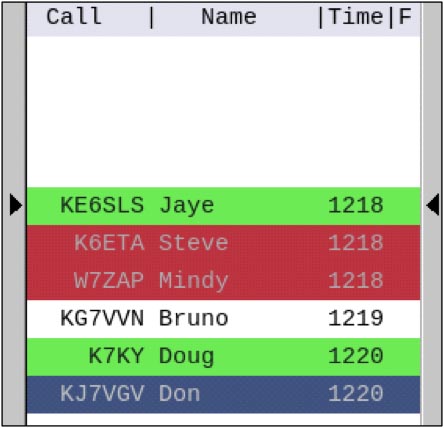
Click on Fldigi. Activate your QST Rnd macro for starting the QST round. After sending your Report on the Flamp file. Use the macro to ask if any other active Ops need fills then go to Flnet click on it. Then move the down arrow on keyboard to the next QST and hit return which transfers that call sign back to Fldigi, you’re ready to send your THEM macro in Fldigi to call that QST. Continue down the list till your done. Alternatively you can hit the F1 key on each QST call sign that is between the arrows and change them from green to white. I use this method so I don’t have to look for green and white boxes.
Your’ve completed the QST. Now you are ready for Comments. Again click on Flnet use the up arrow key and move to the top for your first call sign for comments. If you changed every QST to white go to the top one and hit return. If you did not change them, look for the first green or white at the top of your call sign list and hit return. It will be placed back into Fldigi call sign box. Use your Comment Rnd macro to call the first Op. Go back to Flnet use the down arrow on your keyboard to select the next op, hit return. Use your THEM macro in Fldigi. Repeat till done. Ask for any other closing comments. Finish the net with your Close Net macro, your done.
Additional information:
If at anytime you need to change information on a Call sign move it to between the arrows use F12 it will open a new box. Make your changes and hit update. Another option is to open Editor tab and you can make changes that way as well. The most common change is for nickname, for example William is changed to Bill in the Nickname databox.

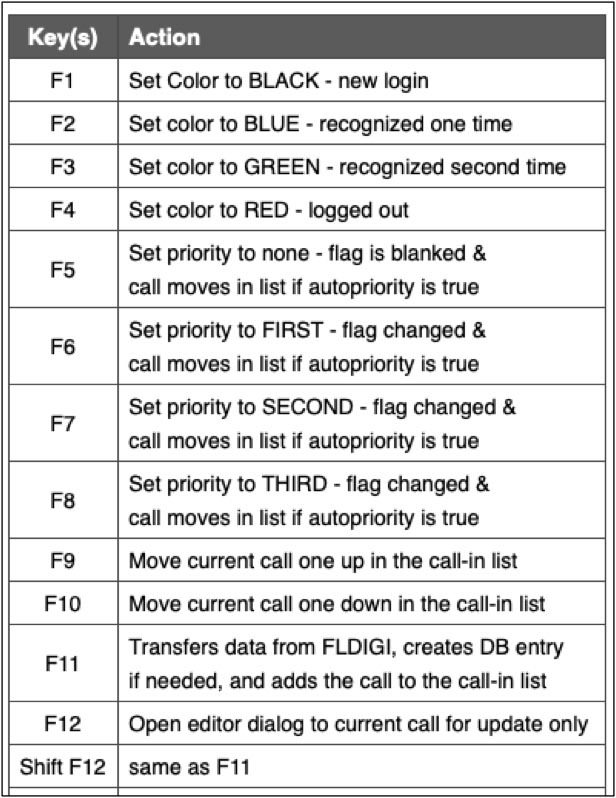
The image below is from Flnet information on their web site. We use F1-F4 for the roster. Note the default color is different from the original set that comes with the Flnet files. You see other F key functions. F5-F8 are not in use by us. You can move a call sign up or down as well if you discover you have missed an Op and added them later using the F9 and F10 keys you can resort the order.
Start off doing a roster when you’re signed in QNX. It won’t take long before you will be performing quicker key responses. 73 Don KJ7VGV